Tesseract-OCR 설치하는 방법
https://github.com/UB-Mannheim/tesseract/wiki
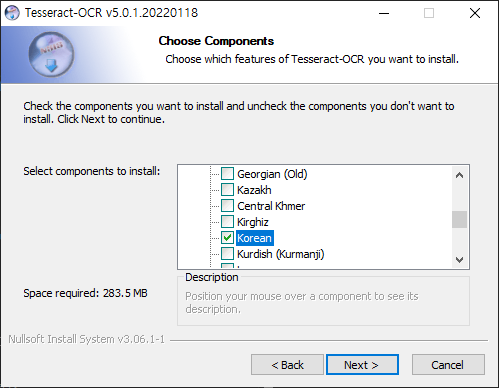
위의 사이트에서 tesseract-ocr-w64-setup-v5.0.1.20220118.exe 파일을 다운로드 하고 설치합니다.
설치할 때 korean 파일을 추가해줍니다.

1단계 : 아직 설치하지 않은 경우 git 설치하기
프로젝트에 필요한 라이브러리를 다운로드하려면 git이 필요합니다.
git 다운로드 링크
https://git-scm.com/download/win
저는 64비트로 설치했습니다.
2단계 : Vcpkg 다운받기
cmd에서 git clone 명령을 사용해서 패키지를 가져오고 vcpkg 부트스트랩 스크립트를 실행합니다.
경로는 본인이 사용하기 편한 곳으로 설정하면 됩니다.
git clone https://github.com/microsoft/vcpkg
.\vcpkg\bootstrap-vcpkg.bat
그 다음 tesseract 라이브러리를 설치합니다. 약 15분-30분 정도 걸립니다.
.\vcpkg\vcpkg install tesseract:x64-windows
3단계 : vcpkg를 Visual Studio와 통합하기
Visual Studio에서 vcpkg를 사용하기 위해 다음 명령을 실행합니다.
.\vcpkg\vcpkg integrate install
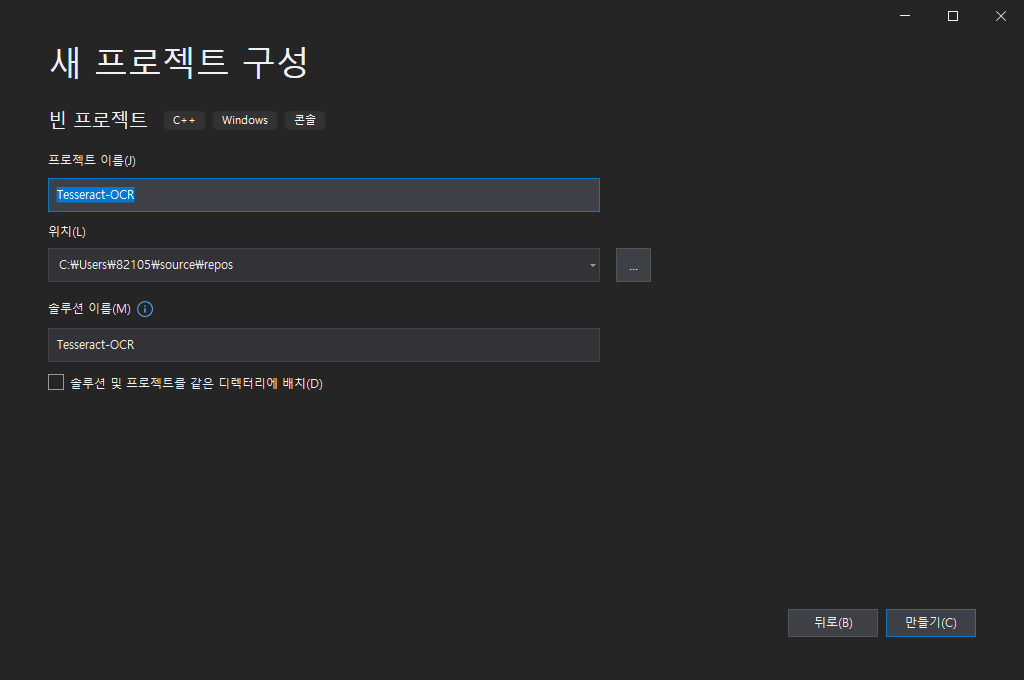
4단계 : Visual Studio로 Tesseract-OCR 사용하기


Tesseract api를 사용해서 이미지를 string으로 출력해봅니다.
#define _CRT_SECURE_NO_WARNINGS
#define NOMINMAX

#include <windows.h>
#include <iostream>
#include <leptonica/allheaders.h>
#include <tesseract/baseapi.h>

char* UTF8ToANSI(const char* pszCode);

int main()
{
    const char* input_image = "C:/img.jpg";

    // tesseract api 설정
    tesseract::TessBaseAPI* api = new tesseract::TessBaseAPI();
    if (api->Init("C:/Program Files/Tesseract-OCR/tessdata", "kor")) {
        return -1;
    }

    // 이미지 설정
    Pix* image = pixRead(input_image);
    api->SetImage(image);

    std::string utf_text = api->GetUTF8Text();
    std::string text = UTF8ToANSI(utf_text.c_str());

    std::cout << text << std::endl;
}

char* UTF8ToANSI(const char* pszCode)
{
    BSTR    bstrWide;
    char* pszAnsi;
    int     nLength;

    // Get nLength of the Wide Char buffer
    nLength = MultiByteToWideChar(CP_UTF8, 0, pszCode, strlen(pszCode) + 1,
        NULL, NULL);
    bstrWide = SysAllocStringLen(NULL, nLength);

    // Change UTF-8 to Unicode (UTF-16)
    MultiByteToWideChar(CP_UTF8, 0, pszCode, strlen(pszCode) + 1, bstrWide, nLength);

    // Get nLength of the multi byte buffer
    nLength = WideCharToMultiByte(CP_ACP, 0, bstrWide, -1, NULL, 0, NULL, NULL);
    pszAnsi = new char[nLength];

    // Change from unicode to mult byte
    WideCharToMultiByte(CP_ACP, 0, bstrWide, -1, pszAnsi, nLength, NULL, NULL);
    SysFreeString(bstrWide);

    return pszAnsi;
}
원본 이미지

출력 결과

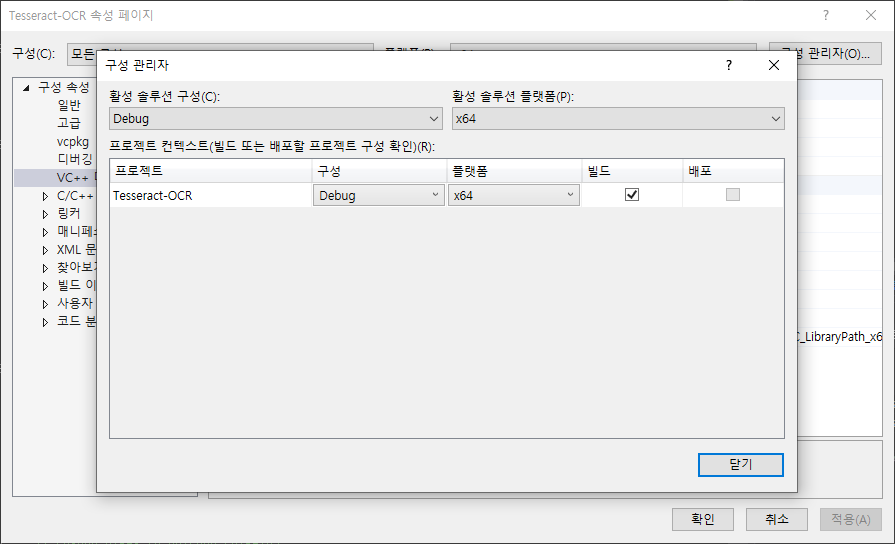
만약 헤더에서 빨간 줄 오류가 뜨면 프로젝트 우클릭 -> 속성으로 가셔서 구성 관리자의 플랫폼을 64비트로 바꿔보세요.


참고한 사이트
Getting started with Tesseract optical character recognition (OCR) library in Visual Studio - technical-recipes.com
This post is a how-to guide on how to get up and running with using the tesseract optical character recognition (OCR) library in a Microsoft Visual Studio environment. The original link can be found at the following github location: https://tesseract-ocr.g
www.technical-recipes.com
https://jay1127.github.io/cpp/5-Use-Tesseract-API/
C++ : 5. Tesseract API 설치 및 사용법
Tesseract 설치
jay1127.github.io
기록용입니다.
'OpenCV' 카테고리의 다른 글
| Visual Studio와 Arduino사용해서 간단한 주차 시스템 구현하기 (0) | 2022.03.25 |
|---|---|
| Visual Studio에서 OpenCV, Tesseract-OCR 사용해서 번호판 인식하고 출력하기 (0) | 2022.03.11 |
| Visual Studio에서 OpenCV 설치하기 (0) | 2022.03.11 |